
You sit down at your desk, notice a Windows 11 Update waiting to install, and click “Update Now.” The progress bar starts. You wait. And wait. And wait some more. After 20 minutes, it still shows 0%. No movement. Nothing happening. Just a frozen number staring back at you.
This is one of the most frustrating experiences a Windows 11 user can have, and you are definitely not alone. Windows 11 Update stuck at 0% is a surprisingly common problem, and it affects both Windows 11 Home and Windows 11 Pro Update users across all kinds of hardware.
Table of Contents
The good news? In most cases, this problem is completely fixable without reinstalling Windows or calling a technician. This guide walks you through every proven solution in simple steps, from the quickest fixes to the more thorough ones, so you can get your Windows 11 Update back on track as fast as possible.
Why Does the Windows 11 Update Get Stuck at 0%?
Before jumping into solutions, it helps to understand what is actually causing the problem. A Windows 11 Update stuck at 0% is usually not random; there is always a reason behind it.
Common Causes
Corrupted update files. Sometimes update files downloaded in a previous attempt get corrupted. Windows gets confused trying to use broken files and freezes before it even starts.
Windows Update Service not running. The Windows Update Service is the background process that manages downloading and installing updates. If this service stopped or crashed, the update cannot proceed at all.
Insufficient disk space. Windows 11 updates, especially major ones, require several gigabytes of free space. If your drive is nearly full, the update stalls immediately.
Third-party software conflicts. Antivirus programs, VPN clients, and security software sometimes interfere with the Windows 11 Update process by blocking connections or locking system files.
Network issues. A slow, unstable, or intermittent internet connection can interrupt the download mid-stream and leave the update frozen.
Software Distribution folder corruption. This is the folder where Windows stores update files as they download. If its contents become corrupted or incomplete, updates refuse to move forward.
Understanding the cause helps you pick the right fix first. Let us go through every solution in order, from simplest to most thorough.
Fix 1: Wait and Check Your Internet Connection
Before doing anything complicated, give the update a genuine chance. Some Windows 11 Updates, especially large feature updates, can appear completely frozen at 0% for 30 to 60 minutes while Windows prepares files or checks for dependencies in the background.
Step 1: Let the update run for at least one hour without touching it.
Step 2: Make sure your internet connection is working properly. Open a browser and load a website to confirm you are online.
Step 3: If you are on Wi-Fi, try switching to a wired Ethernet connection. Wi-Fi can drop packets during large downloads, causing the Windows 11 Update to stall.
Step 4: Restart your router if your internet feels sluggish. Wait two minutes, reconnect, and check whether the update starts moving.
If the update is still frozen after an hour and your internet is stable, move to the next fix.
Fix 2: Restart Windows Update Service
The Windows Update Service manages the entire update process. If it has crashed or stopped, restarting it often gets things moving again.
Step 1: Press Windows + R to open the Run dialogue box.
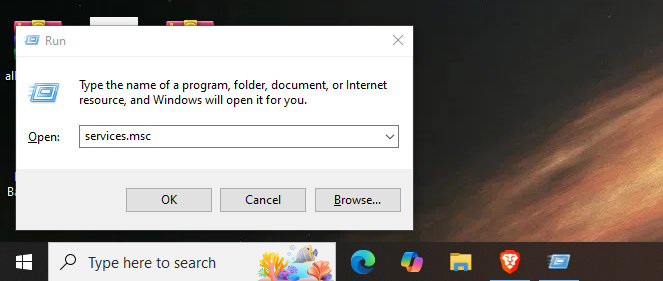
Step 2: Type services.msc and press Enter. The Services window opens.
Step 3: Scroll down the list and find “Windows Update.” Right-click it and select Stop.
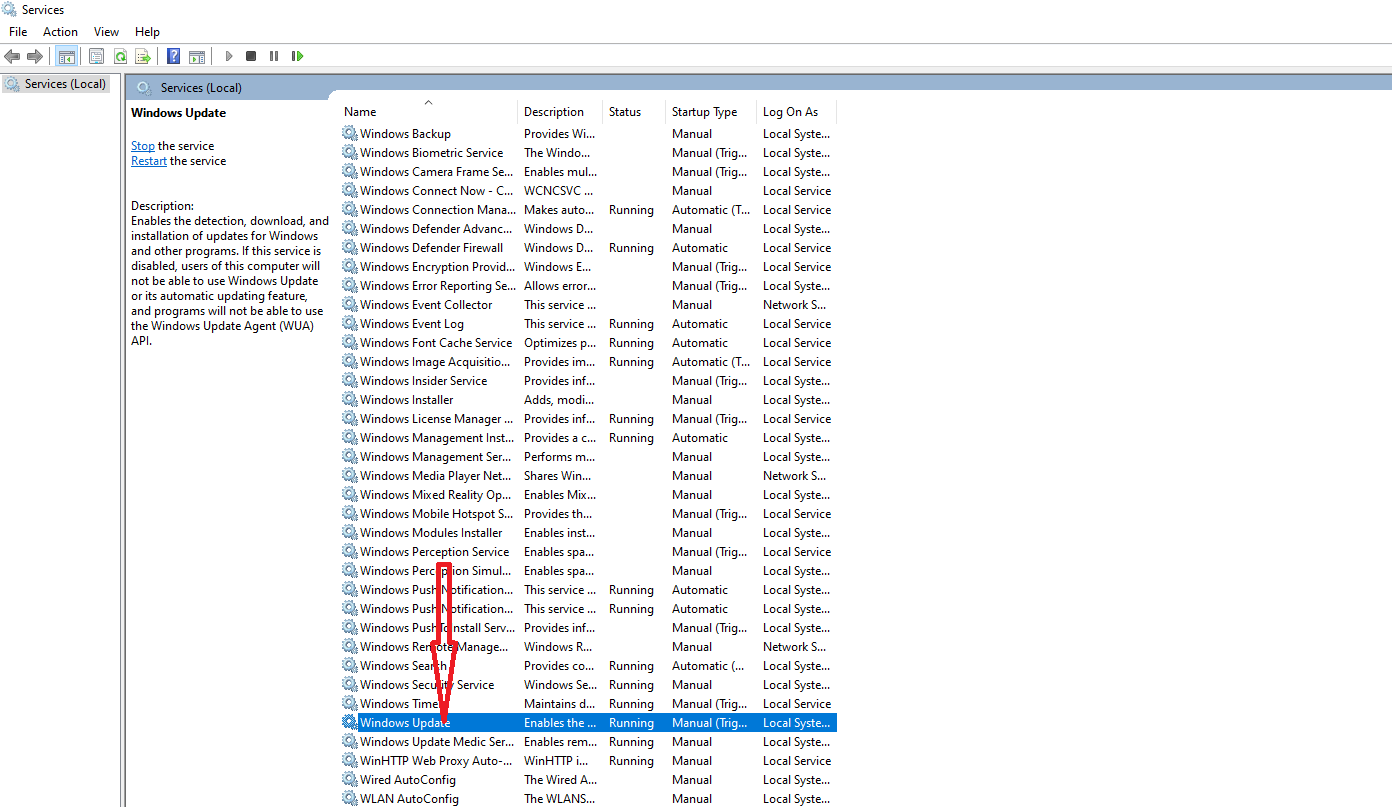
Step 4: Wait about 30 seconds, then right-click “Windows Update” again and select Start.
Step 5: Also restart these related services the same way: Background Intelligent Transfer Service (BITS) and Cryptographic Services.
Step 6: Close the Services window, go back to Settings, and try running the Windows 11 Update again.
This simple restart clears temporary errors and gives the update service a fresh start.
Fix 3: Run the Windows Update Troubleshooter
Windows 11 comes with a built-in tool specifically designed to detect and fix Windows 11 Update problems. It is the easiest automated fix available.
Step 1: Open Settings by pressing Windows + I.
Step 2: Click System, then scroll down and click Troubleshoot.
Step 3: Click “Other troubleshooters.”
Step 4: Find “Windows Update” in the list and click the Run button next to it.
Step 5: Follow the on-screen instructions. The troubleshooter will scan for issues, attempt to fix them automatically, and report what it found.
Step 6: Restart your computer after the troubleshooter finishes, then try the Windows 11 Pro Update again.
The troubleshooter catches many of the most common causes including stopped services, corrupted components, and registry issues.
Fix 4: Clear the Software Distribution Folder
The Software Distribution folder stores temporary update files. When these files become corrupted or incomplete, every new update attempt uses the same bad files and gets stuck again. Clearing this folder forces Windows to download fresh update files from scratch.
Step 1: First, stop the Windows Update Service. Press Windows + R, type services.msc, and Stop the Windows Update service as described in Fix 2.
Step 2: Open File Explorer and navigate to:
C:\Windows\SoftwareDistribution\Download
Step 3: Select all the files inside the Download folder by pressing Ctrl + A, then press Delete to remove them. Do not delete the folder itself — only its contents.
Step 4: Go back to Services and Start the Windows Update service again.
Step 5: Restart your computer.
Step 6: Go to Settings, then Windows Update, and click Check for Updates. Windows will download clean update files and attempt the installation again.
This fix resolves the majority of Windows 11 Update stuck at 0% problems caused by corrupted download data.
Fix 5: Run System File Checker and DISM
If system files themselves are damaged, updates cannot install properly. Windows 11 has two built-in command-line tools that can scan and repair these files.
Step 1: Open Command Prompt as Administrator. Right-click the Start button and select “Terminal (Admin)” or “Windows PowerShell (Admin).”
Step 2: Type the following command and press Enter:
sfc /scannow
This runs the System File Checker, which scans Windows system files and repairs any corrupted ones it finds. The scan takes 10 to 20 minutes. Do not close the window while it is running.
Step 3: After SFC finishes, run the DISM tool by typing:
DISM /Online /Cleanup-Image /RestoreHealth
DISM connects to Windows Update online and uses it to replace damaged system image files. This can take 20 to 30 minutes depending on your internet speed.
Step 4: Once both tools complete, restart your computer.
Step 5: Try running the Windows 11 Update again.
Fix 6: Temporarily Disable Antivirus and VPN
Security software is an important protection, but some antivirus programs and VPN clients interfere with the Windows 11 Pro Update download and installation process by blocking Microsoft’s update servers or locking system files.
Step 1: Temporarily disable your antivirus by right-clicking its icon in the system tray and selecting Disable or Turn Off. Choose “Disable for 15 minutes” or the shortest available time.
Step 2: If you have a VPN running, disconnect it and turn it off.
Step 3: Go to Settings and attempt the Windows 11 Update immediately.
Step 4: If the update starts and completes, your security software was the culprit. Re-enable it after the update finishes and consider adding a Windows Update exception in your antivirus settings.
Step 5: If the update still stalls, re-enable your antivirus and move to the next fix.
Fix 7: Free Up Disk Space
Major Windows 11 Updates can require 10 GB or more of free disk space. If your drive is almost full, the update stalls at 0% because there is nowhere to put the downloaded files.
Step 1: Open Settings, go to System, then click Storage.
Step 2: Click “Temporary files” to see how much space you can recover. Check the boxes next to items like “Temporary files,” “Recycle Bin,” and “Windows Update Cleanup,” then click Remove files.
Step 3: Consider uninstalling apps you no longer use. Go to Settings, Apps, then Installed Apps, and remove anything unnecessary.
Step 4: Move large files like videos, photos, and downloads to an external drive or cloud storage to free additional space.
Step 5: After clearing space, go back to Windows Update and try again. Aim to have at least 15 GB free before attempting a major update.
Fix 8: Reset Windows Update Components Manually
If none of the above fixes work, resetting all Windows Update components from scratch is a comprehensive solution that clears every possible issue at once.
Step 1: Open Command Prompt as Administrator.
Step 2: Stop all update-related services by running these commands one at a time, pressing Enter after each:
net stop wuauserv
net stop cryptSvc
net stop bits
net stop msiserver
Step 3: Rename the corrupted folders so Windows creates fresh ones:
ren C:\Windows\SoftwareDistribution SoftwareDistribution.old
ren C:\Windows\System32\catroot2 catroot2.old
Step 4: Restart the stopped services:
net start wuauserv
net start cryptSvc
net start bits
net start msiserver
Step 5: Restart your computer, then go back to Settings and run Windows Update.
This reset is the nuclear option that resolves almost every Windows 11 Update stuck at 0% issue that simpler fixes could not clear.
Practical Tips to Prevent Future Update Problems
Once you get your Windows 11 Update working, keep these tips in mind to avoid the same problem in the future.
First, never interrupt an update in progress. Do not force-restart your computer or cut the power while an update is installing, even if it appears frozen. This can corrupt system files and make future updates harder. Second, always maintain at least 20 GB of free space on your system drive to ensure updates have enough room to work. Third, schedule updates for overnight hours when you are not using the computer, so interruptions are less likely. Fourth, periodically clear the SoftwareDistribution\Download folder even when updates are working fine, it prevents build-up of old, potentially corrupted files. Fifth, keep your Windows 11 Pro Update settings configured to install updates automatically so critical security patches are never delayed.
FAQ
Why is my Windows 11 Update stuck at 0% for hours?
A Windows 11 Update stuck at 0% for hours typically means the update service has crashed, the download files are corrupted, your internet connection is unstable, or security software is blocking the update. Start with the troubleshooter fix, then clear the Software Distribution folder if that does not resolve it.
Is it safe to restart my computer when a Windows 11 Update is stuck?
If the update appears completely frozen at 0% and nothing is happening for more than an hour, a restart is generally safe. At 0%, the installation has not started yet, so there is little risk of corrupting your system. Use the “Restart” option rather than a hard power-off whenever possible.
How much disk space does a Windows 11 Update need?
Most routine Windows 11 Updates require 2 to 5 GB of free space. Major feature updates can require 10 to 20 GB. It is a good habit to keep at least 20 GB free on your system drive to prevent updates from stalling due to space issues.
Will fixing a stuck Windows 11 Pro Update delete my files?
No. The fixes in this guide clearing the Software Distribution folder, running SFC and DISM, or resetting update components do not delete your personal files, documents, photos, or applications. They only affect temporary update files and Windows system components.
What if my Windows 11 Update is still stuck after trying everything?
If every fix in this guide has failed, try downloading the update manually using the Windows 11 Update Assistant or the Media Creation Tool from Microsoft’s official website. These tools bypass the standard Windows Update process and can often install updates that are blocked through normal channels.
Conclusion
A Windows 11 Update stuck at 0% is annoying, but it is rarely permanent. In most cases, one of the eight fixes in this guide will get your update moving again in under 30 minutes. Start with the quickest options like restarting the Windows Update service and running the built-in troubleshooter, then work through the more thorough fixes like clearing the Software Distribution folder and running SFC and DISM if needed.
The key is not to panic, not to force a shutdown mid-update, and to work through the solutions systematically. Each fix targets a different possible cause, so if one does not work, the next one likely will.
Once your Windows 11 Pro Update is installed, keep your system healthy by maintaining enough free disk space, avoiding unnecessary interruptions, and letting scheduled updates run overnight. A fully updated Windows 11 system is a faster, safer, and more reliable system and it is worth the few extra minutes it takes to keep it that way.
Your update will finish. Follow the steps, stay patient, and you will be back to full speed before you know it.